What you read in this article:
What is JUnit?
JUnit is a test framework in the Java programming language environment. The framework is used in a variety of areas, such as testing small portions of applications as well as various projects. In this article, I, Arsalan Mirbozorgi, try to tell you a few tips for using JUnit so that I can increase your knowledge in this field.

Advantage:
Testing the program at every step will help you in error finding. In general, testing a program results in error finding, productivity, and also the stability of the code you write. There are very simple tools that can allow us to test our own code. JUnit is a tool that can help us in this regard.
Training work with JUnit:
1- First of all, you need to create your classes in the project-name / src / test / java path.
2- After creating a new class, just add @SpringBootTest to your class.
3- In the next part, for specifying test methods in the class, add @Test to them.
4- To ensure that a method is really performed in a class like repository or service or any other class, we must do @Autowired. This action will test the method.
5- To test methods in JUnit, you can use static methods in the Assert class, such as AssertEquals, AssertTrue, and….
6- If you add @Before to a method, that method will be active before each method when the class test is running.
7- @After works exactly like @Before, except that running that method is done after running each method.
8- Adding @BeforClass and @AfterClass also allows the test runs after the method.
Example:
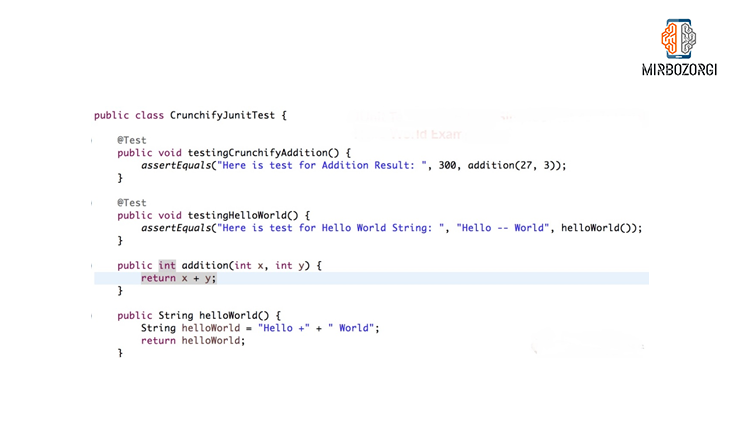
In the image below you can see an example of a Java class. In this class @test is used to specify the requested method for testing.


